iPhone Battery Replacement Guide — Complete Step by Step
Complete guide to replacing your iPhone battery at home. Learn the signs of battery degradation, which battery to buy, tools needed, and step-by-step instructions for all iPhone models.
GoFixKart Team
GoFixKart Team
Why iPhone Batteries Degrade Over Time
Every iPhone battery is a lithium-ion cell with a finite number of charge cycles. Apple considers a battery to be in good condition if it retains 80% or more of its original capacity after 500 complete charge cycles. Once you cross that threshold, you will notice your iPhone shutting down unexpectedly, running hot, or struggling to last through a full day on a single charge.
This is not a defect — it is the natural chemistry of lithium-ion batteries. The good news is that replacing an iPhone battery is one of the most cost-effective repairs you can do, and in most cases you do not need to visit an Apple Store to get it done.
Signs Your iPhone Battery Needs Replacement
Before spending money on a new battery, confirm that the battery is actually the problem. Here are the clearest signs:
- Battery health below 80% — Go to Settings → Battery → Battery Health & Charging. If the maximum capacity reads below 80%, Apple itself recommends replacement.
- Unexpected shutdowns — Your iPhone powers off at 20%, 15%, or even 40% charge. This is a classic sign of a degraded cell that can no longer sustain peak power demand.
- Performance throttling warning — iPhone shows a message saying "Performance management has been applied." This is iOS intentionally slowing your processor to prevent shutdowns caused by a weak battery.
- Phone gets very hot while charging — Normal charging produces mild warmth. Excessive heat during charging, especially near the bottom of the phone, often indicates a battery that is struggling.
- Battery drains from 100% to 30% in under 3 hours — With normal use (calls, browsing, camera), a healthy iPhone battery should last 8–12 hours. Anything significantly less points to battery degradation.
- Swollen or bulging back — If the back glass of your iPhone has started to lift or the screen seems to be pushing out from the frame, the battery is swelling due to internal gas buildup. This is a safety issue — stop charging the phone immediately and get the battery replaced as soon as possible.
iPhone Battery Replacement Cost in India
The cost varies depending on the model and where you get it done:
- iPhone 6, 6s, SE (1st gen) — Genuine battery: Rs. 400–700 | Apple Service Center: Rs. 2,500–3,500
- iPhone 7, 7 Plus, 8, 8 Plus — Genuine battery: Rs. 600–1,000 | Apple Service Center: Rs. 3,000–4,500
- iPhone X, XR, XS, XS Max — Genuine battery: Rs. 900–1,400 | Apple Service Center: Rs. 4,500–6,500
- iPhone 11, 11 Pro, 11 Pro Max — Genuine battery: Rs. 1,200–1,800 | Apple Service Center: Rs. 5,000–7,500
- iPhone 12, 12 Mini, 12 Pro, 12 Pro Max — Genuine battery: Rs. 1,400–2,200 | Apple Service Center: Rs. 6,000–9,000
- iPhone 13, 13 Pro, 14, 15 series — Genuine battery: Rs. 1,800–3,000 | Apple Service Center: Rs. 7,000–12,000
Buying the battery yourself from a trusted supplier like GoFixKart and getting it installed at a local repair shop typically saves you 50–70% compared to Apple's service center pricing.
Genuine vs Aftermarket iPhone Batteries — What to Buy
This is the most important decision in the repair process. There are three types of batteries available in the market:
- Original Apple battery (OEM) — Pulled from genuine Apple devices or sourced through official channels. Exact same capacity and performance as the factory battery. Best choice if you can find a verified genuine unit.
- Grade A aftermarket battery — Made by third-party manufacturers with cells that closely match Apple's original specifications. Good quality, reliable performance. Most repair shops use these. Look for batteries with BIS certification if buying in India.
- Cheap unbranded batteries — Avoid entirely. These often falsely claim 3,500 mAh capacity for an iPhone 12 (which Apple rates at 2,815 mAh). They drain faster, heat more, and in rare cases pose safety risks.
A key test: weigh the battery. Genuine iPhone batteries weigh very close to Apple's stated weight for that model. Fake batteries often feel lighter because they contain less actual cell material.
Tools Required for iPhone Battery Replacement
iPhone battery replacement requires specific tools. Do not attempt this without the right equipment — you risk damaging the screen, display connector, or logic board.
- Pentalobe P2 screwdriver (for bottom screws — this is iPhone-specific, not standard Phillips)
- Phillips #000 screwdriver (for internal screws)
- Plastic pry picks and spudger
- Suction cup tool
- Heat gun or iOpener (for softening display adhesive)
- Isopropyl alcohol 90%+ (for cleaning adhesive)
- Battery adhesive strips (pre-cut for your model)
- Anti-static wristband
- Tweezers
Step-by-Step iPhone Battery Replacement Guide
The process differs slightly between models, but the core steps are consistent across iPhone 6 through iPhone 15. Here is the full procedure:
Step 1 — Power Off the iPhone
Hold the side button and volume down, then slide to power off. Never work on a powered iPhone — this risks short circuits and data loss. If the battery is severely degraded and the phone will not turn on, proceed with extra care and disconnect the battery as the very first internal step.
Step 2 — Remove the Pentalobe Screws
Two tiny Pentalobe P2 screws sit at the bottom of the iPhone, one on each side of the Lightning or USB-C port. Remove both and keep them in a small tray — they are extremely easy to lose. A standard Phillips screwdriver will not work here; you need the correct Pentalobe bit.
Step 3 — Heat the Display Edges
Apply gentle heat around the edges of the display for 60–90 seconds using a heat gun on low or an iOpener bag. This softens the thin adhesive gasket that seals the screen to the frame. The display should feel warm but never too hot to touch. Overheating risks OLED burn-in and battery damage.
Step 4 — Lift the Display
Place a suction cup on the lower half of the screen. Pull upward firmly while inserting a plastic pick at the bottom edge. Slide the pick along the left and right sides — never the top, as the front camera, Face ID components, and display cables are all routed along the top edge.
Open the display like a book, rotating from the bottom up, and prop it at approximately 90 degrees. Do not open it beyond 90 degrees or the display flex cables will tear.
Step 5 — Disconnect the Display (if needed)
On iPhone X and later, the display cables are at the top right of the logic board under a metal bracket. Remove the bracket screws (usually 2–3), then disconnect the display connectors carefully using a spudger. This step is optional on some models where you can access the battery without fully disconnecting the screen — but fully disconnecting is safer for beginners.
Step 6 — Disconnect the Battery Connector
On the right side of the logic board, locate the battery flex cable connector. Remove the small metal bracket over it (1–2 screws) and pry the connector off the board using a plastic spudger. This is the most important safety step — do not skip it.
Step 7 — Remove the Old Battery
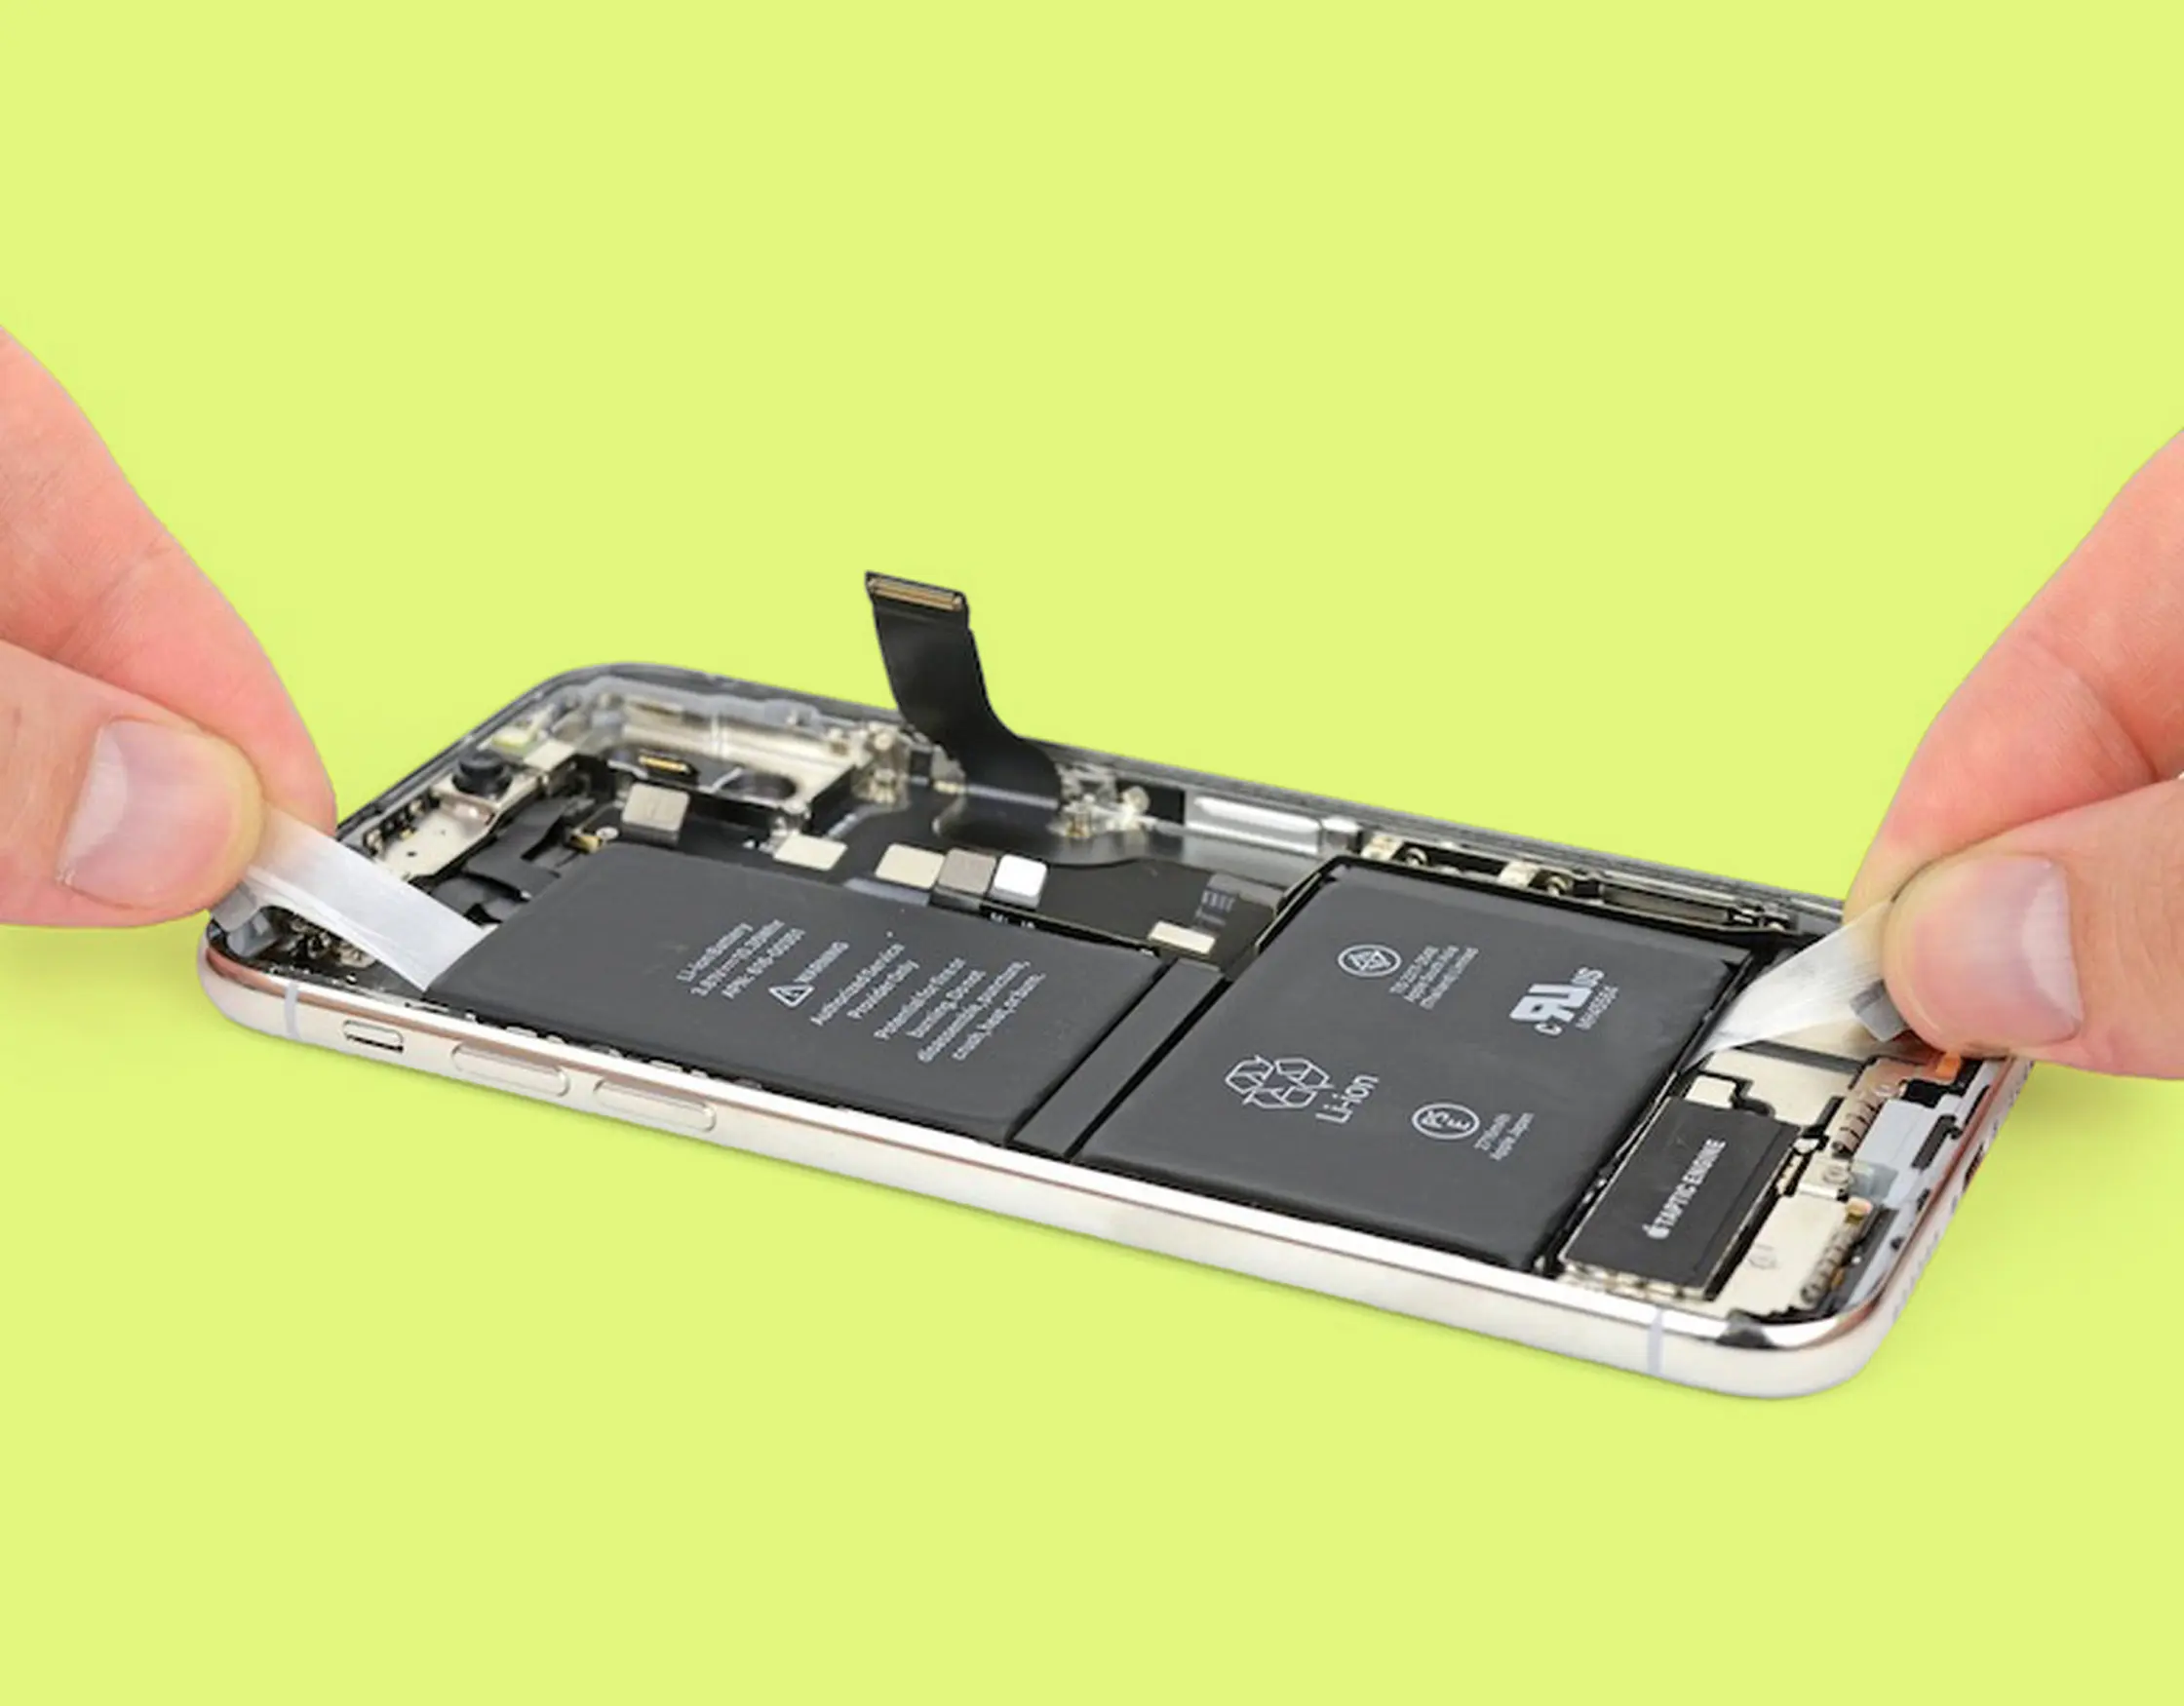
iPhone batteries are held in place with adhesive pull tabs — thin plastic strips that stretch and release when pulled at a low angle. On iPhone 6–8, there are two tabs. On iPhone X and later, there are typically four or more.
Grip the tab end that is visible at the bottom of the battery and pull slowly and steadily at a 15–30 degree angle along the length of the phone. If a tab breaks, apply a small amount of isopropyl alcohol around the battery edges and wait 2 minutes — this helps dissolve the remaining adhesive.
Never use metal tools to pry the battery directly — lithium-ion batteries puncture easily and can catch fire if pierced.
Step 8 — Clean the Battery Bay
Remove any adhesive residue using isopropyl alcohol on a cotton swab. Wipe clean and let it fully dry before installing the new battery.
Step 9 — Install the New Battery
Peel the backing off the new adhesive strips and position the battery correctly in the battery bay. Press down firmly for 30 seconds to secure the adhesive. Reconnect the battery flex cable — press down until you hear or feel a click. Reconnect the display connectors if you disconnected them.
Step 10 — Test Before Sealing
This is the most important step that beginners skip: before reassembling, power on the iPhone and check that the display works, touch response is normal, and the battery percentage shows correctly. If everything works, power off and proceed to seal. If the display does not respond, you likely have a slightly disconnected display cable — open it up and reseat the connectors.
Step 11 — Reassemble and Seal
Replace the display by pressing it into the frame starting from the top edge, then pressing down along the sides. Replace the two Pentalobe screws at the bottom. Power on and confirm everything works.
After the Replacement — Important Steps
A new battery will not immediately read 100% battery health in Settings. Here is what to do after installation:
- Calibrate the battery — Charge the phone to 100% and leave it on the charger for an extra hour. Then use it normally until it dies completely. Charge it back to 100% without interruption. This one full cycle helps iOS calibrate the battery percentage display accurately.
- Check battery health after 24 hours — Settings → Battery → Battery Health & Charging should show 100% maximum capacity after calibration.
- Optimized charging — Enable Optimized Battery Charging (Settings → Battery → Battery Health) to slow the rate of future degradation.
- Avoid extreme temperatures — Do not charge in temperatures above 35°C or store below 0°C. This is the single biggest factor in long-term battery life.
When to See a Professional Instead
Battery replacement is manageable for careful DIY users on iPhone 6 through iPhone 11. However, consider a professional repair shop if:
- You are repairing an iPhone 12, 13, 14, or 15 — these models have more fragile OLED displays and complex internal layouts
- Your iPhone has Face ID — any displacement of the TrueDepth camera module during repair can permanently break Face ID, which cannot be restored without Apple's proprietary tools
- The battery is visibly swollen — handle with extreme caution, wear gloves, and do not charge the phone before replacement
- You are not comfortable with the Pentalobe screws — stripping these screws can make the phone nearly impossible to open without professional tools
Find Your iPhone Battery at GoFixKart
GoFixKart stocks genuine and Grade A batteries for every iPhone model from iPhone 5 through iPhone 15 Pro Max. Every battery is tested before dispatch for capacity accuracy and connector fit. All orders come with battery adhesive strips, free same-day dispatch on most orders, and a 7-day return policy.
Search your iPhone model on GoFixKart to find the exact replacement battery — with competitive pricing, BIS-compliant cells, and secure packaging so the battery arrives safe and ready to install.